

Crown Moulding


![]()
The cabinets are DeWils
Cabinets that were purchased from and installed by Gary Kazda at All Your Building Needs in Pomeroy.
Return to menu of Revere Renovation
| Tin ceiling goes up in the Gordon's kitchen | ||
| Click
on the individual pictures to see larger photo and description
|
||
|
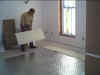
Because the nails holding up the tin ceiling need to anchor into something, the drywall (already finished with three coats of mud and primed) have to be covered with 1/4" plywood. A number of lines are chalked on the ceiling to allow John and Zack to hang the plywood straight. | |
|
The first piece of plywood is up. Zack checks to see how straight it is. | |
|
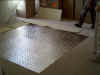
In order to make sure Beverly ordered enough pieces of the ceiling tin (especially since we're mixing new and old tin ceiling pieces), we lay the tiles on the floor. | |
|
The mockup of the tin ceiling grows. | |
|
Beverly checks to see how it looks with the tin spacer strip. | |
|
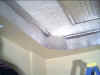
After the plywood is on the ceiling, we gridded out the initial set of chalk lines for the center 4x4 (8'x8') tin. | |
|
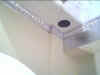
Watch the sprinkler head! | |
|
The tin ceiling is up! | |
|
Zack nails up more ceiling. | |
|
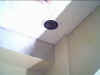
Here we're fitting the tin closely around the ceiling light box. (Tin snips were provided by David Webb of the Lost Highway Museum. Thanks, David.) | |
|
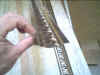
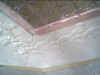
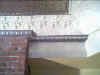
Here's the moulding that covers the "gap" between the new 2x2 tin pieces and the old original 2x4 tin that we salvaged from the ceiling of the old building. | |
|
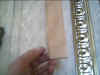
This piece of 1/2" plywood was cut to the right width ... | |
|
to fit into the raised channel of the moulding... | |
|
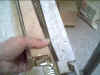
then we screwed the "bumber boards" up right next to the new 2x2' panels and butted the old ceiling tin to the board. | |
|
Speakers (mesh covering and speaker trim to be painted later. | |
|
We took the bumper boards down... | |
|
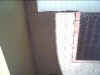
... and nailed up the moulding to cover the gap. | |
|
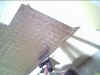
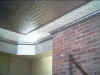
The faces of the soffits were covered with tin. | |
|
We nailed. . . | |
|
... and nailed. | |
|
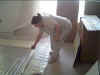
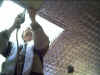
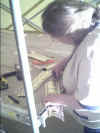
Beverly is cutting the "nosling" that covers the lip of the skylight shaft. | |
|
Crown Moulding |
||
|
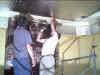
John and Beverly decided to do the "hard part" of the crown moulding first. corners! | |
|
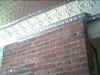
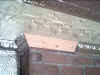
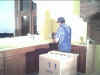
Here is the top of Beverly's oven hood. Remember not to nail into the bricks! | |
|
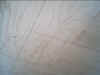
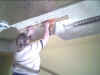
It's a stretch, but Beverly is drawing the lines to use in making sure the crown moulding is up straight. | |
|
Talk about itty, bitty corner pieces. | |
|
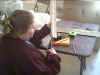
Ok, so just how many degrees is this corner? | |
|
I trying to cope with this coping stuff. | |
|
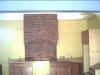
The Last blank spot for Crown Moulding. | |
|
She's cutting the last piece. | |
|
And it's done! | |
|
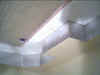
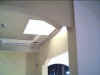
A view of the skylight shaft | |
|
One happy camper! | |
|
Gary Kazda installing the counter top. | |
|
Wow, what a fan enclosure! | |
|
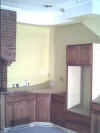
Another view of kitchen and cabinets. | |
| These pages are updated on an infrequent basis as John has to fit them in with all the other fun stuff he does. If you would like to receive an e-mail notice when we add stuff, just click here to send a request. | ||
|
|
||
| We purchased our new
tin ceiling material from
Brian Greer's Tin Ceilings. He worked with us on selecting the new tin
we'd need, was great on shipping it to us, and even better on follow-up
questions as we worked our way through the project. One hint: Make sure
you ask for the cutting templates before you start. The old tin
ceiling referred to above was salvaged from the 1880's portion of our
building; the layers of paint were stripped off; they were protected from
rust, and primed, installed and painted.
The cabinets are DeWils
Cabinets that were purchased from and installed by Gary Kazda at All Your Building Needs in Pomeroy. |
||
| Return to menu of Revere Renovation |
||